> For the complete documentation index, see [llms.txt](https://docs.vega365.com/llms.txt). Markdown versions of documentation pages are available by appending `.md` to page URLs; this page is available as [Markdown](https://docs.vega365.com/redundancy-management-framework/user-manual/configuration-dashboard/architecture-selection/independent.md).

# Independent

Follow these instructions if you have two separate XProtect deployments, each with its own, independent Management Servers and SQL servers, and the sites are not federated.

Perform the following steps for an Independent architecture:

1. Select the **Independent** architecture option.

* For **First-time configuration**, the following screen will appear.

<figure><img src="https://73860689-files.gitbook.io/~/files/v0/b/gitbook-x-prod.appspot.com/o/spaces%2FK95oxUATgzuZZ2VhRoDw%2Fuploads%2F11tl2gDWVkWylVQ5ktrz%2Fimage%20(9).png?alt=media&amp;token=1dc37856-ede0-4ca4-a4ae-dc41e4bc338d" alt="" width="563"><figcaption><p>First-time Configuration Screen</p></figcaption></figure>

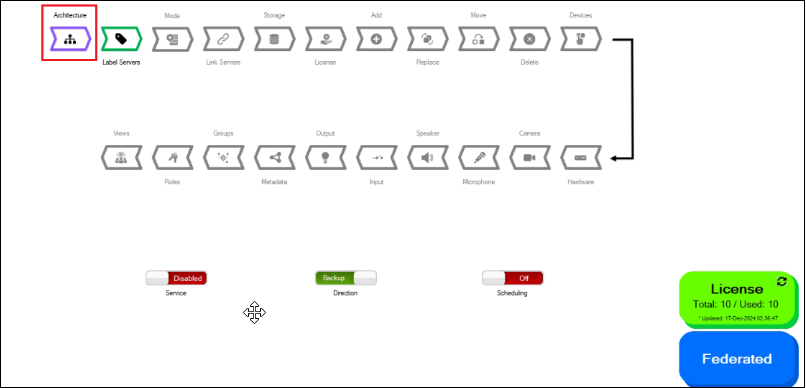
* For subsequent architectural changes, click the **Architecture** button on the following screen.

<figure><img src="https://content.gitbook.com/content/K95oxUATgzuZZ2VhRoDw/blobs/bcWlBjiH5WOAOW8ZPIfI/Fedchange.png" alt=""><figcaption><p>Architecture Screen</p></figcaption></figure>

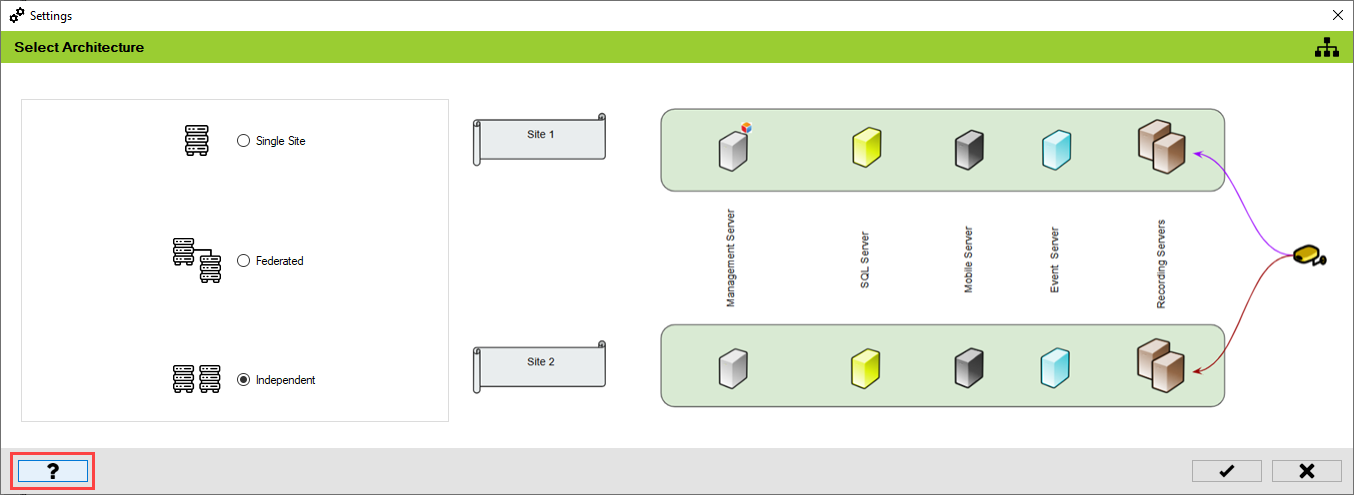
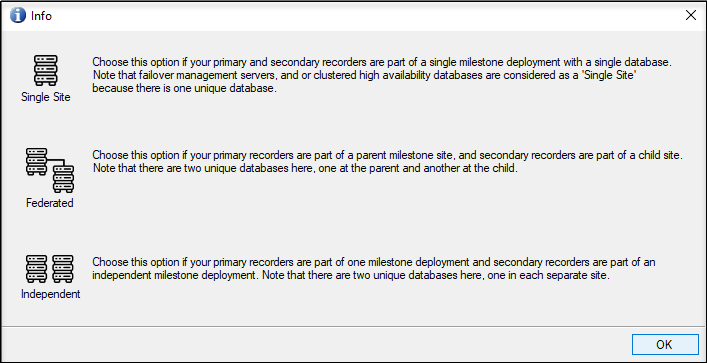
For more information, click the **Help** icon.

<figure><img src="https://content.gitbook.com/content/K95oxUATgzuZZ2VhRoDw/blobs/ppmQYJx515rox1RrE6UQ/Help1.png" alt=""><figcaption><p>Help Icon</p></figcaption></figure>

<figure><img src="https://content.gitbook.com/content/K95oxUATgzuZZ2VhRoDw/blobs/D4tXLCXkZ73ox8ZMyLIR/Info.png" alt=""><figcaption><p>Help Information</p></figcaption></figure>

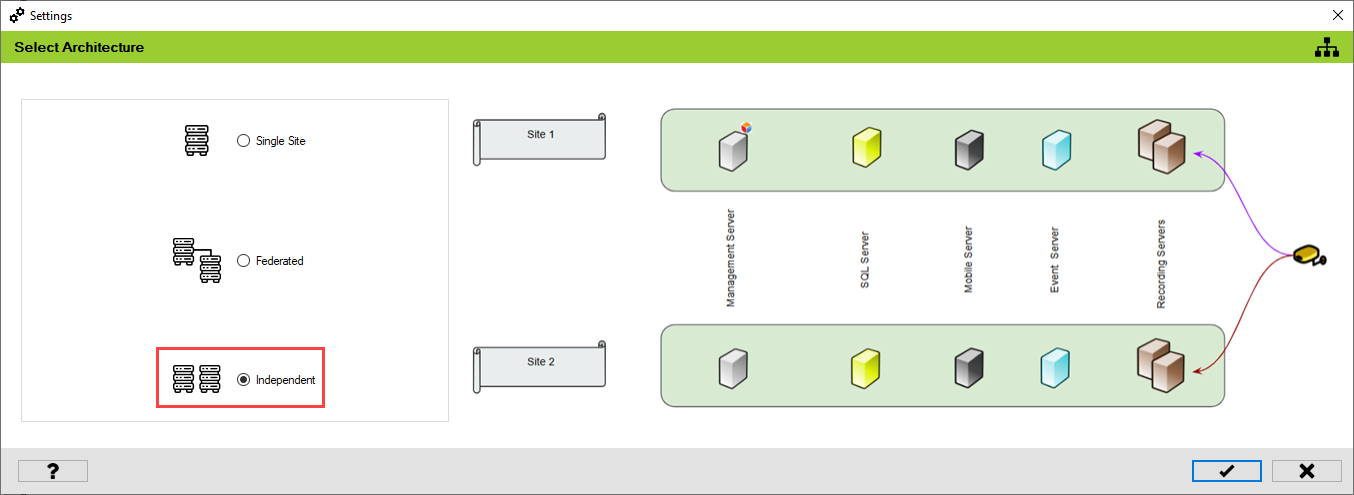
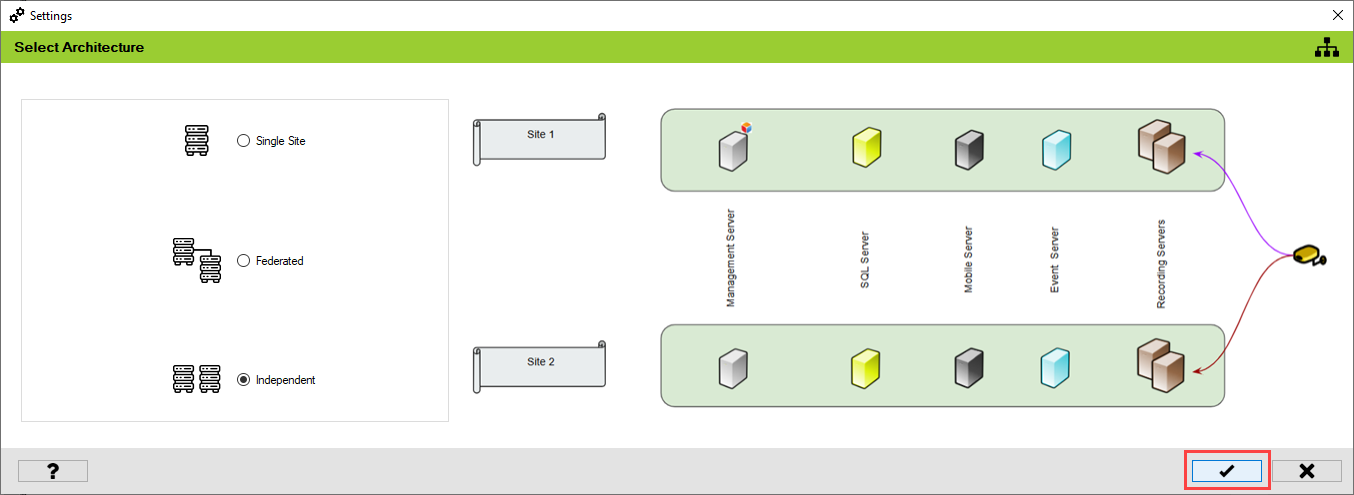
6. Choose the architecture that represents the XProtect deployment at the site. In this scenario, select **Independent**.

<figure><img src="https://content.gitbook.com/content/K95oxUATgzuZZ2VhRoDw/blobs/meOkE1J50iwMKn2TpVGO/Independent.png" alt=""><figcaption><p>Independent Architecture Selection Screen</p></figcaption></figure>

7. Click the **tick mark** at the bottom of the screen to save the architecture.

<figure><img src="https://content.gitbook.com/content/K95oxUATgzuZZ2VhRoDw/blobs/iV2PQIcY1RXrVpVnnsBd/IndependentSave.png" alt=""><figcaption></figcaption></figure>

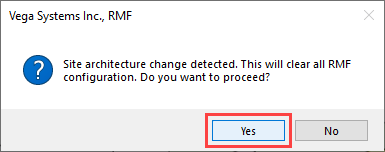
8. Click **Yes** to confirm.&#x20;

<figure><img src="https://content.gitbook.com/content/K95oxUATgzuZZ2VhRoDw/blobs/KBLEkQCnJ7Wh1vfFLNHF/Yes.png" alt=""><figcaption><p>Architecture Change Confirmation</p></figcaption></figure>

{% hint style="info" %}
**Note:** All the previous RMF configuration settings are cleared.
{% endhint %}

9. Click the **Save** icon in the top left corner of the Milestone toolbar to apply the changes.&#x20;

<figure><img src="https://73860689-files.gitbook.io/~/files/v0/b/gitbook-x-prod.appspot.com/o/spaces%2FK95oxUATgzuZZ2VhRoDw%2Fuploads%2FtJy5y9QCKJW2GcCdfHR2%2FSave.png?alt=media&amp;token=b7c93b17-4817-4bcc-b344-1dca43c2e2b0" alt=""><figcaption><p>Milestone Save Icon</p></figcaption></figure>

{% hint style="info" %}
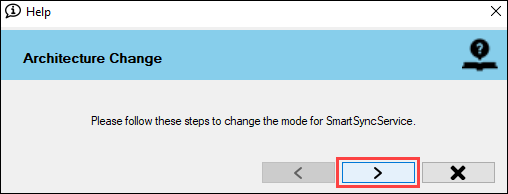
**Note:** The following screens appear. You must perform these steps to configure the SmartSyncService.
{% endhint %}

<figure><img src="https://content.gitbook.com/content/K95oxUATgzuZZ2VhRoDw/blobs/iORnW2WygWOPYJsjvmJE/ArchitectureChange.png" alt=""><figcaption><p>Architecture Change Onscreen Instruction</p></figcaption></figure>

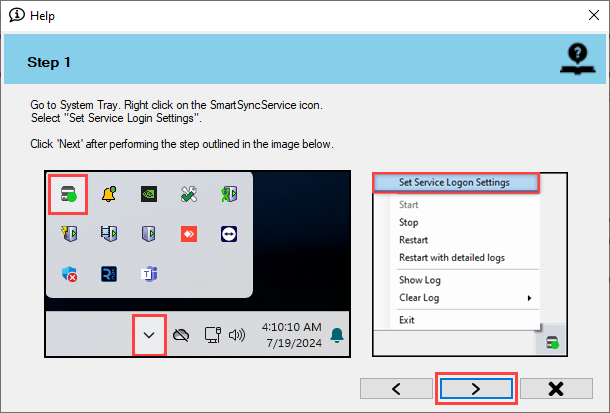
**Step 1:** Navigate to **System Tray -> Right-click SmartSyncService -> Set Service Logon Settings**.

<figure><img src="https://content.gitbook.com/content/K95oxUATgzuZZ2VhRoDw/blobs/zdQJ3m56ob2xdpm64UZ2/Step1.png" alt=""><figcaption><p>SmartSyncService (Step 1)</p></figcaption></figure>

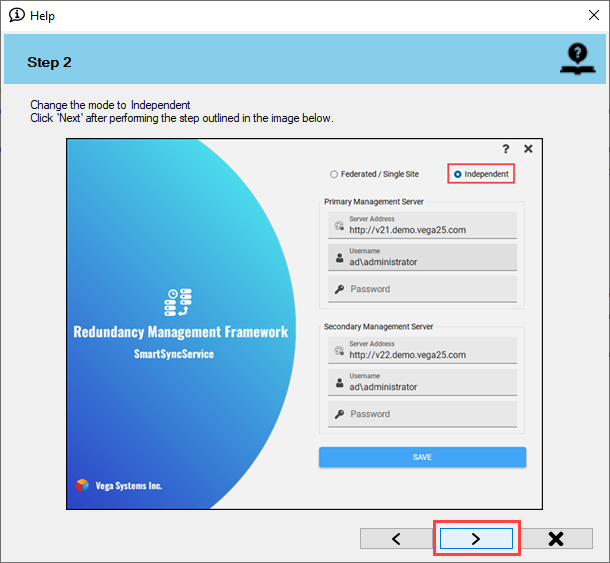
**Step 2:** Select **Independent**.

<figure><img src="https://content.gitbook.com/content/K95oxUATgzuZZ2VhRoDw/blobs/47O07kZ3R2Vd7nqip10d/Step2ind.png" alt=""><figcaption><p>SmartSyncService (Step 2)</p></figcaption></figure>

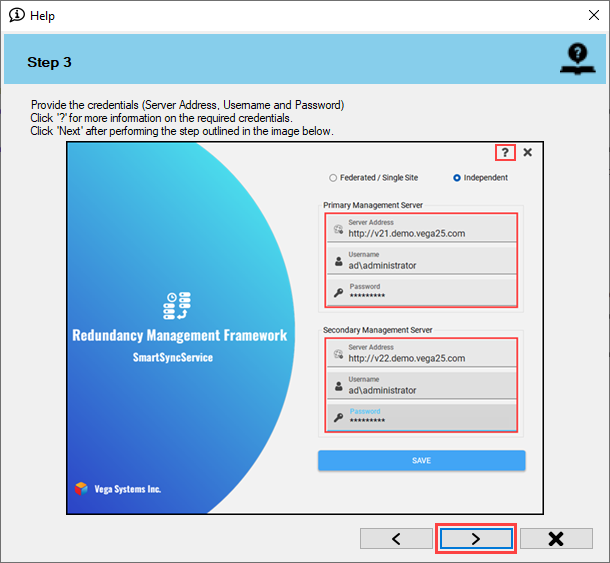
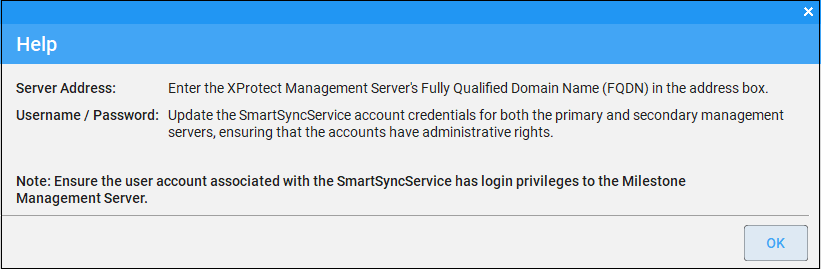
**Step 3:** Provide the credentials. Click the **Help** icon for more information.

<figure><img src="https://content.gitbook.com/content/K95oxUATgzuZZ2VhRoDw/blobs/d7YrimirtlEuhOLIiCWc/Step3ind.png" alt=""><figcaption><p>SmartSyncService (Step 3)</p></figcaption></figure>

<figure><img src="https://content.gitbook.com/content/K95oxUATgzuZZ2VhRoDw/blobs/0KV7rQHjhZO1dG6HIFs2/HelpInd.png" alt=""><figcaption><p>SmartSyncService (Help) </p></figcaption></figure>

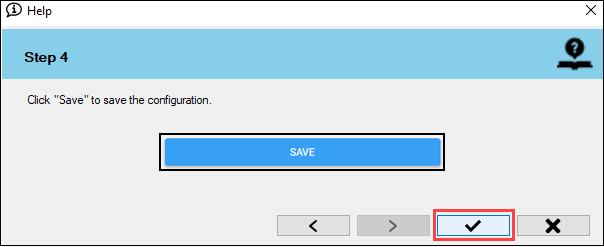
**Step 4:** Click **Save** to save the configuration.

<figure><img src="https://content.gitbook.com/content/K95oxUATgzuZZ2VhRoDw/blobs/Rxo1NiNc2aZgbf1zwOUu/Step4.png" alt=""><figcaption><p>SmartSyncService (Step 4)</p></figcaption></figure>

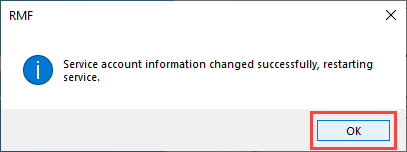
10. Click **OK**.

<figure><img src="https://content.gitbook.com/content/K95oxUATgzuZZ2VhRoDw/blobs/NIOHBBnNdlCWB2qbI4zr/Restart.png" alt=""><figcaption><p>SmartSyncService Restart Confirmation</p></figcaption></figure>

{% hint style="info" %}
**Note:** The service restarts with the new credentials provided.
{% endhint %}

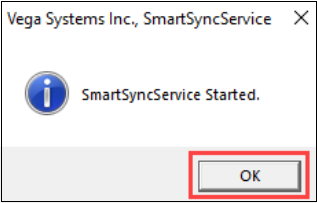
11. Click **OK**.

<figure><img src="https://content.gitbook.com/content/K95oxUATgzuZZ2VhRoDw/blobs/mthuBrFcgpbgaflZeKh3/SmartSyncServiceCompletion.png" alt=""><figcaption><p>SmartSyncService Completion</p></figcaption></figure>

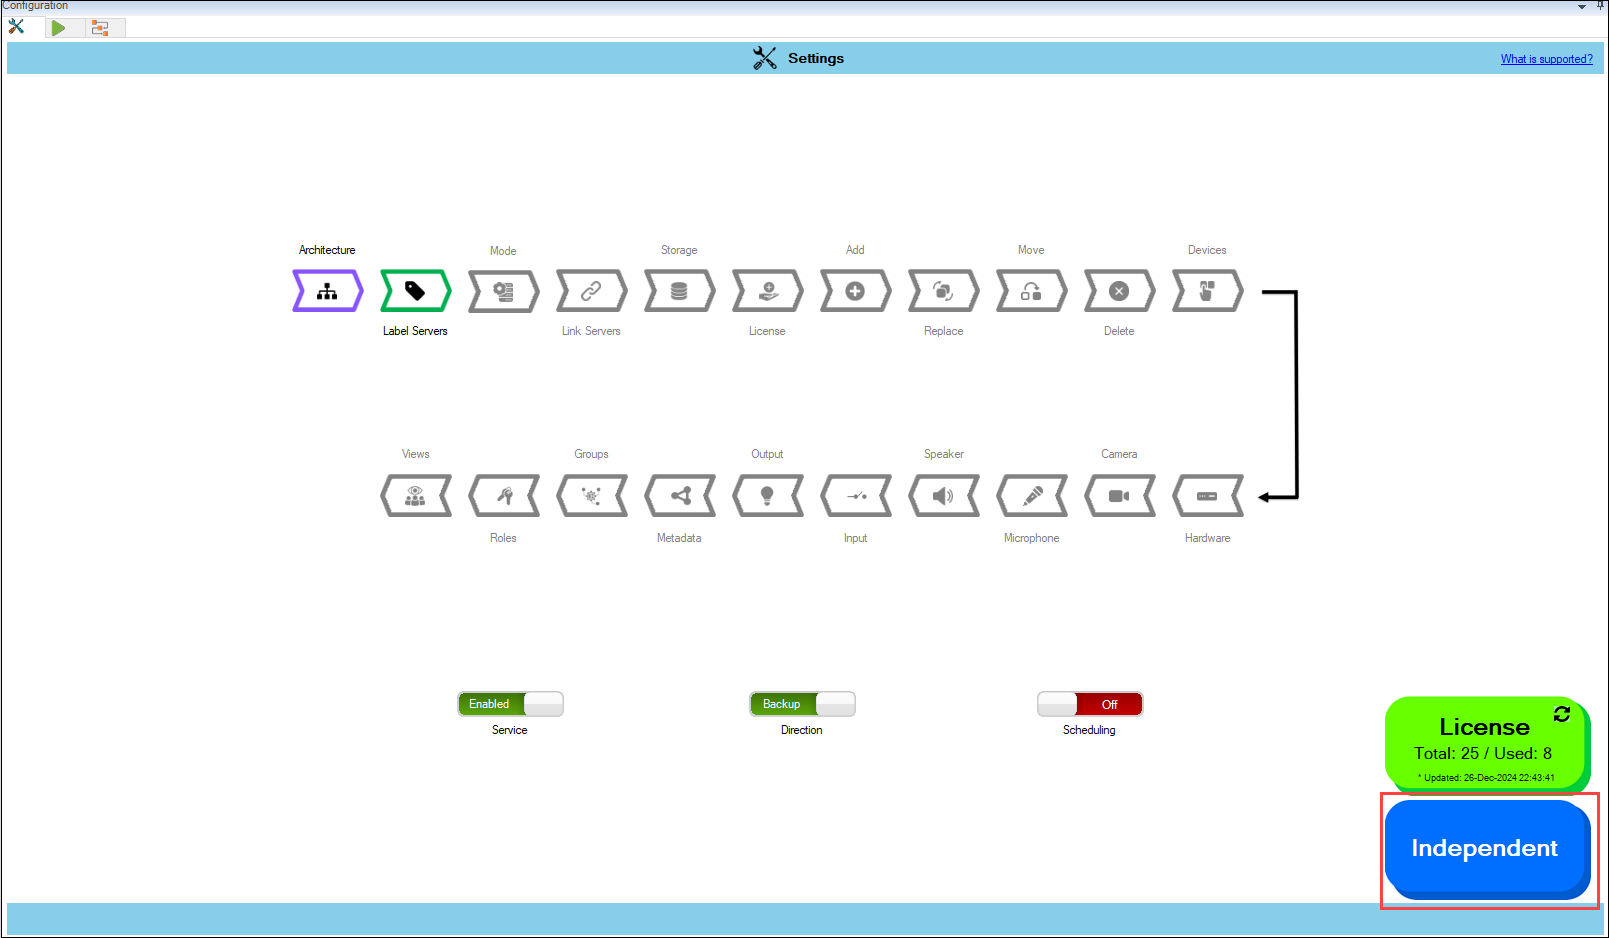
12. Verify that the Independent architecture type has been configured successfully. The selected architecture will be displayed at the bottom right.

<figure><img src="https://content.gitbook.com/content/K95oxUATgzuZZ2VhRoDw/blobs/mo56L4uDn4gbamJvvX3a/Independentverify.png" alt=""><figcaption><p>Independent Architecture Verification Screen</p></figcaption></figure>