> For the complete documentation index, see [llms.txt](https://docs.vega365.com/llms.txt). Markdown versions of documentation pages are available by appending `.md` to page URLs; this page is available as [Markdown](https://docs.vega365.com/redundancy-management-framework/user-manual/configuration-dashboard/architecture-selection/single-site.md).

# Single Site

Follow this section if your deployment has a single database. Note that clustered, failover or other HA databases are considered a single database.

Perform the following steps for a Single Site architecture:

1. Select the **Single Site** architecture option.

* For **First-time** configuration, the following screen will appear.&#x20;

<figure><img src="https://content.gitbook.com/content/K95oxUATgzuZZ2VhRoDw/blobs/OU0qZXEqKeeeCvbVCsDg/First-time.png" alt="" width="563"><figcaption><p>First-time Configuration Screen</p></figcaption></figure>

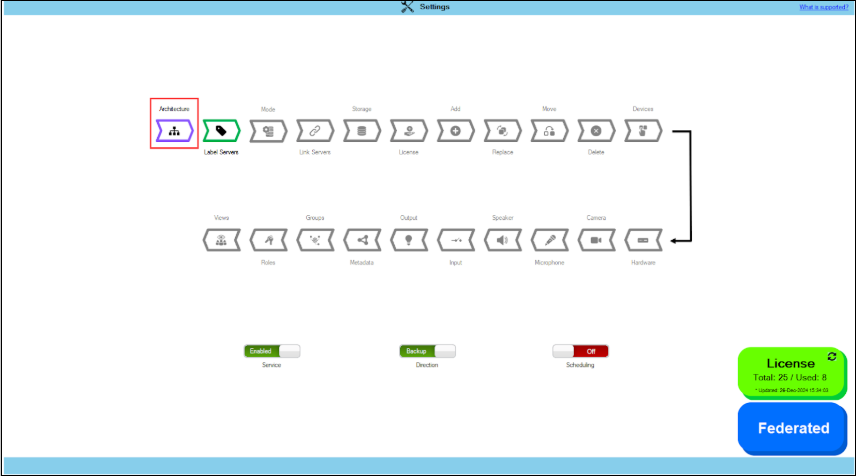
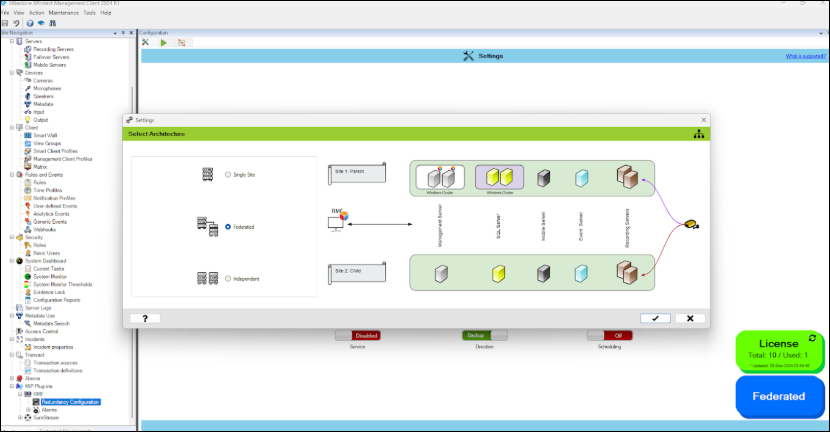
* &#x20;For subsequent architectural changes, click the **Architecture** button on the following screen.

<figure><img src="https://content.gitbook.com/content/K95oxUATgzuZZ2VhRoDw/blobs/HyNbQ4QOVrM2LzykkSYg/Federated1.png" alt=""><figcaption><p>Architecture Screen</p></figcaption></figure>

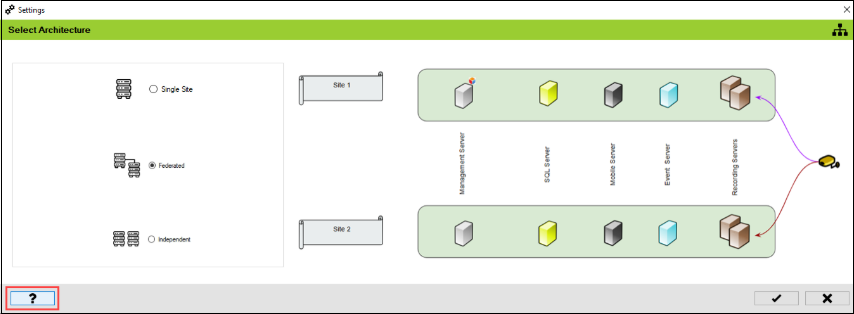
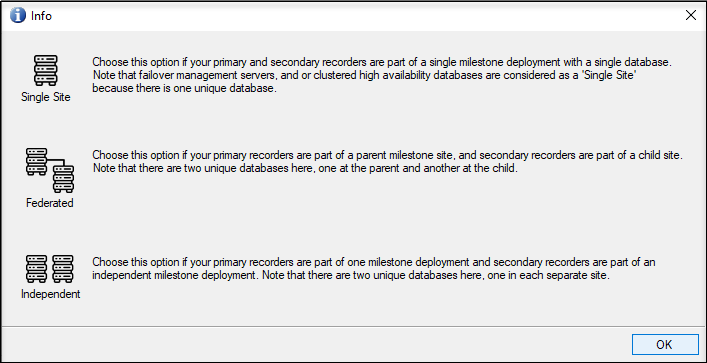
For more information, click the **Help** icon.&#x20;

<figure><img src="https://content.gitbook.com/content/K95oxUATgzuZZ2VhRoDw/blobs/m9uHV1mr6KHgC1btSJDF/Helpsinglesite.png" alt=""><figcaption><p>Help Icon</p></figcaption></figure>

<figure><img src="https://content.gitbook.com/content/K95oxUATgzuZZ2VhRoDw/blobs/p0qN99Bv9EsK3KM87uyp/Info.png" alt=""><figcaption><p>Help Information</p></figcaption></figure>

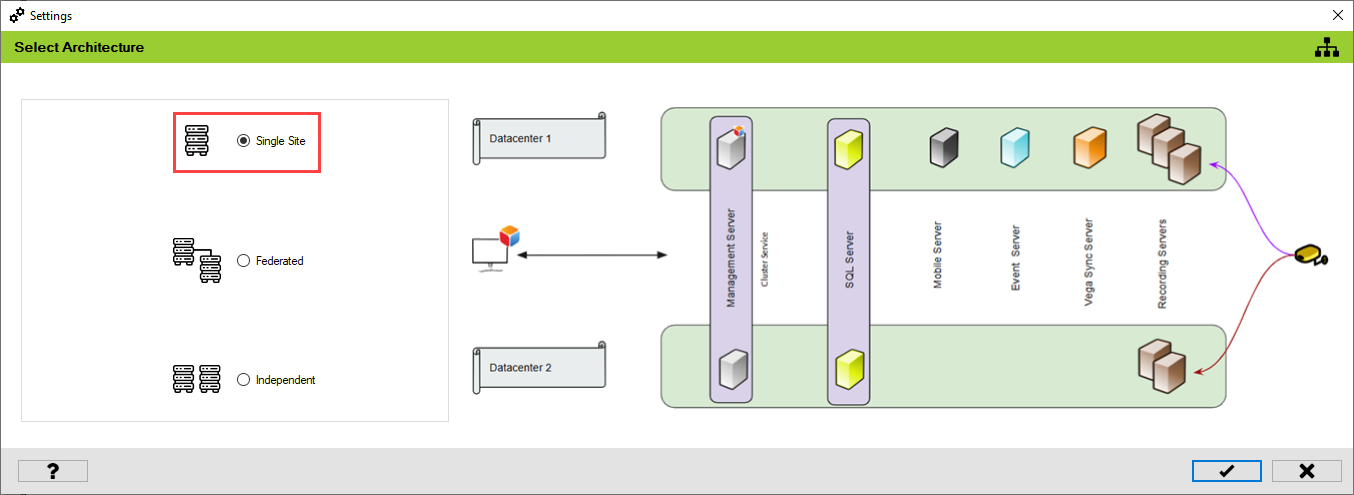
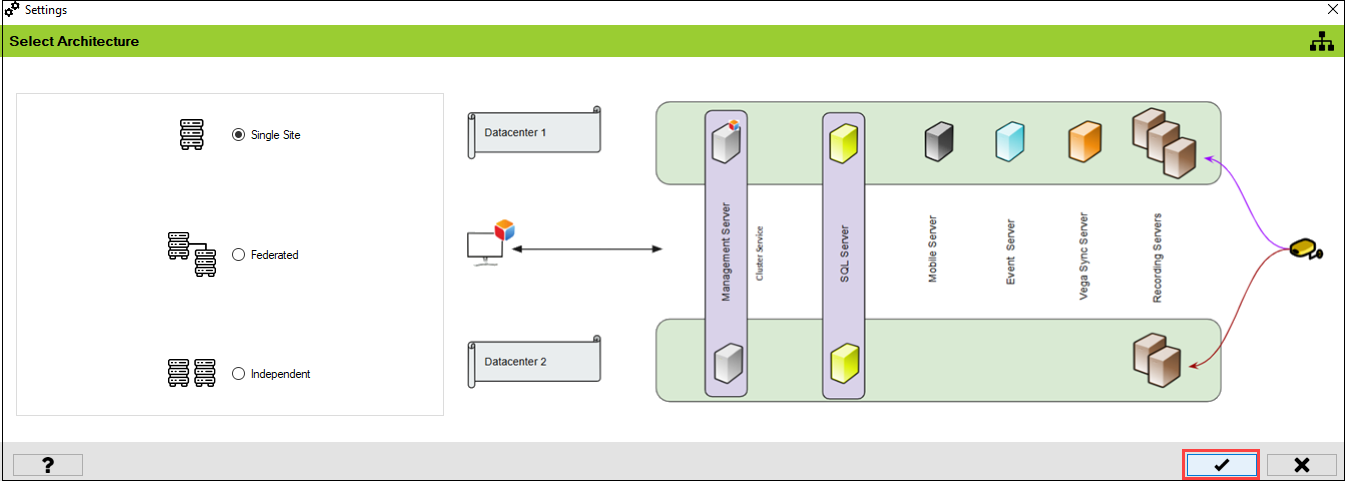
6. Choose the architecture that represents the XProtect deployment at the site. In this scenario, select **Single Site**.&#x20;

<figure><img src="https://content.gitbook.com/content/K95oxUATgzuZZ2VhRoDw/blobs/4O0jx7XG5y9lLzVfb8WF/SingleSite.png" alt=""><figcaption><p>Single Site Architecture Selection Screen</p></figcaption></figure>

7. Click the **tick mark** at the bottom of the screen to save the architecture.

<figure><img src="https://content.gitbook.com/content/K95oxUATgzuZZ2VhRoDw/blobs/wsMwUQUf0oZck5gWlGQ7/SaveSinglesite.png" alt=""><figcaption><p>Save Single Site Architecture </p></figcaption></figure>

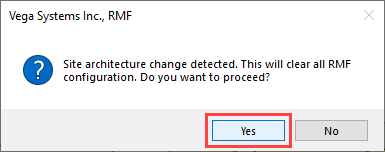
8. Click **Yes** to confirm.

<figure><img src="https://content.gitbook.com/content/K95oxUATgzuZZ2VhRoDw/blobs/l14lSwGglAZAlSYg7PrG/Yes.png" alt=""><figcaption><p>Architecture Change Confirmation</p></figcaption></figure>

{% hint style="info" %}
**Note:** All the previous RMF configuration settings are cleared.
{% endhint %}

9. Click the **Save** icon in the top left corner of the Milestone toolbar to apply the changes.

<figure><img src="https://73860689-files.gitbook.io/~/files/v0/b/gitbook-x-prod.appspot.com/o/spaces%2FK95oxUATgzuZZ2VhRoDw%2Fuploads%2FtJy5y9QCKJW2GcCdfHR2%2FSave.png?alt=media&amp;token=b7c93b17-4817-4bcc-b344-1dca43c2e2b0" alt=""><figcaption><p>Milestone Save Icon</p></figcaption></figure>

{% hint style="info" %}
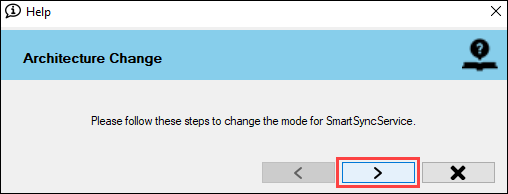
**Note:** The following screens appear. You must perform these steps to configure the SmartSyncService.
{% endhint %}

<figure><img src="https://content.gitbook.com/content/K95oxUATgzuZZ2VhRoDw/blobs/iORnW2WygWOPYJsjvmJE/ArchitectureChange.png" alt=""><figcaption><p>Architecture Change Onscreen Instruction</p></figcaption></figure>

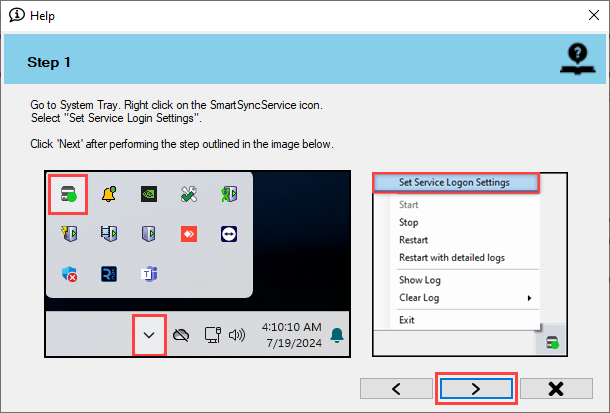
**Step 1:** Navigate to **System Tray -> Right-click SmartSyncService -> Set Service Logon Settings**.

<figure><img src="https://content.gitbook.com/content/K95oxUATgzuZZ2VhRoDw/blobs/zdQJ3m56ob2xdpm64UZ2/Step1.png" alt=""><figcaption><p>SmartSyncService (Step 1)</p></figcaption></figure>

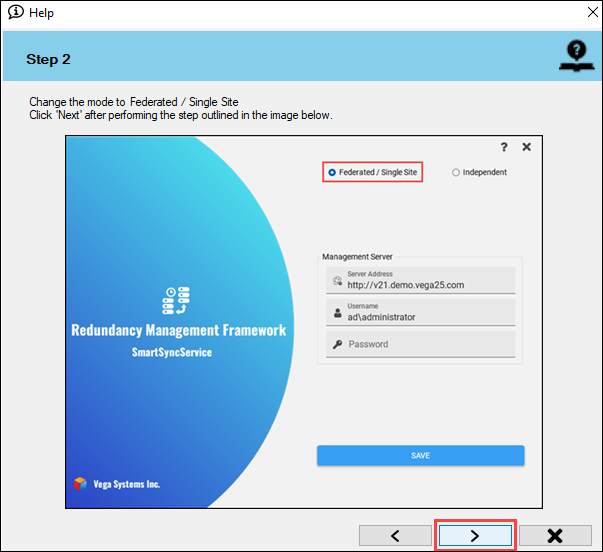
**Step 2:** Select **Federated/Single Site**.

<figure><img src="https://content.gitbook.com/content/K95oxUATgzuZZ2VhRoDw/blobs/0I5gfGh0D5IL8cOf8TIR/Step2.png" alt=""><figcaption><p>SmartSyncService (Step 2)</p></figcaption></figure>

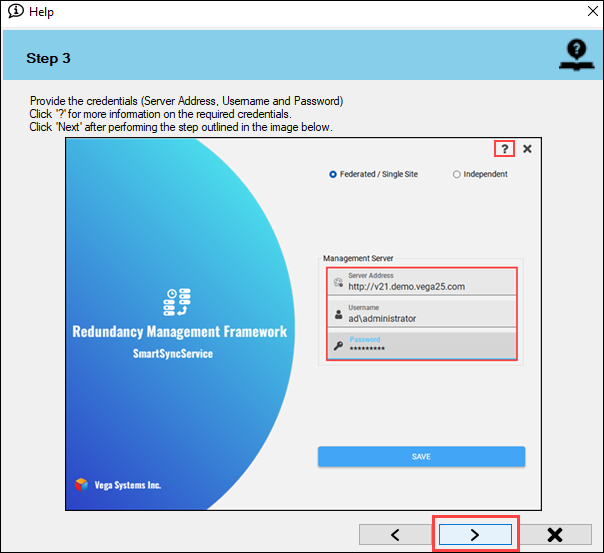
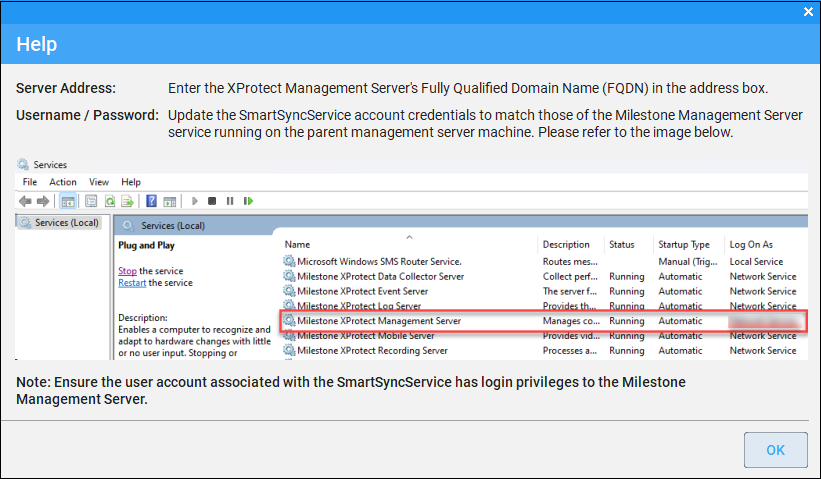
**Step 3:** Provide the credentials. Click the **Help** icon for more information.

<figure><img src="https://content.gitbook.com/content/K95oxUATgzuZZ2VhRoDw/blobs/34PMlLkO3H146wY3EVTj/Step3.png" alt=""><figcaption><p>SmartSyncService (Step 3)</p></figcaption></figure>

<figure><img src="https://content.gitbook.com/content/K95oxUATgzuZZ2VhRoDw/blobs/V7Fbap7ptMTmZF7CBgUe/Helpstep.png" alt=""><figcaption><p>SmartSyncService (Help)</p></figcaption></figure>

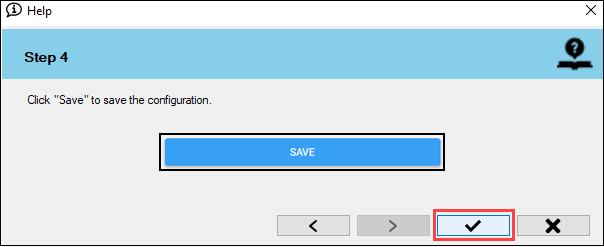
**Step 4:** Click **Save** to save the configuration.

<figure><img src="https://content.gitbook.com/content/K95oxUATgzuZZ2VhRoDw/blobs/Rxo1NiNc2aZgbf1zwOUu/Step4.png" alt=""><figcaption><p>SmartSyncService (Step 4)</p></figcaption></figure>

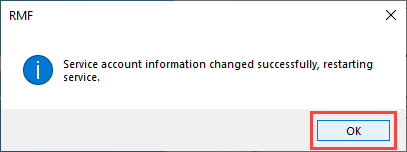
10. Click **OK**.

<figure><img src="https://content.gitbook.com/content/K95oxUATgzuZZ2VhRoDw/blobs/NIOHBBnNdlCWB2qbI4zr/Restart.png" alt=""><figcaption><p>SmartSyncService Restart Confirmation</p></figcaption></figure>

{% hint style="info" %}
**Note:** The service restarts with the new credentials provided.&#x20;
{% endhint %}

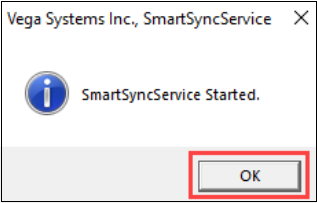
11. Click **OK**.

<figure><img src="https://content.gitbook.com/content/K95oxUATgzuZZ2VhRoDw/blobs/mthuBrFcgpbgaflZeKh3/SmartSyncServiceCompletion.png" alt=""><figcaption><p>SmartSyncService Completion</p></figcaption></figure>

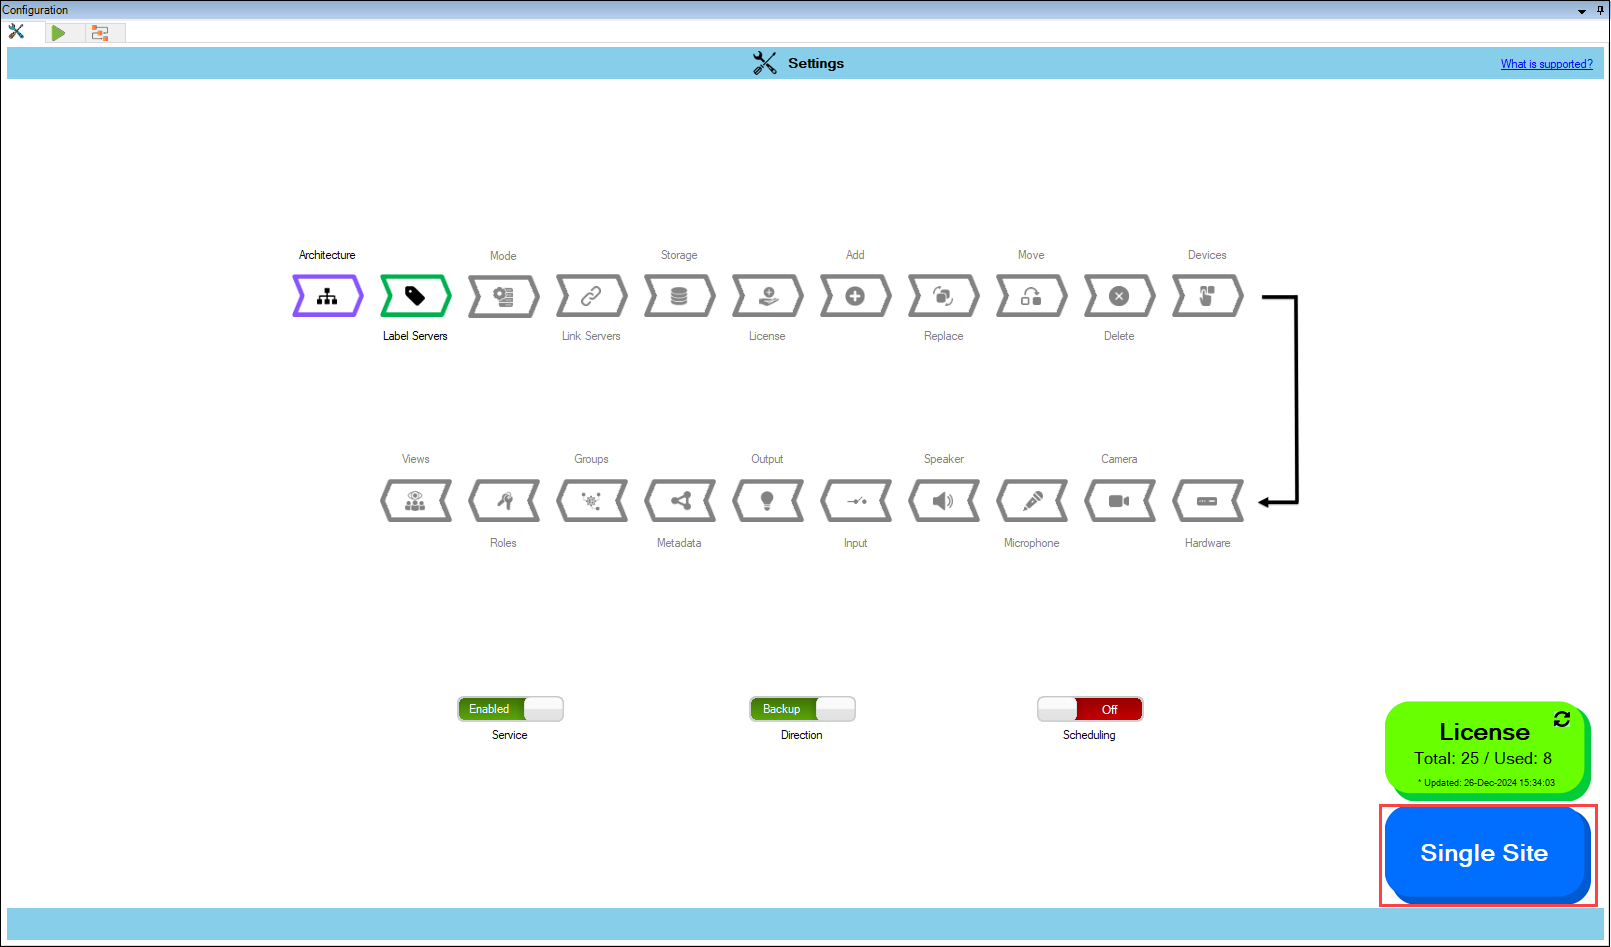
12. Verify that the Single Site architecture type has been configured successfully. The selected architecture will be displayed at the bottom right.

<figure><img src="https://content.gitbook.com/content/K95oxUATgzuZZ2VhRoDw/blobs/LexV36BmjAQzVMCQx2vX/Singlesite%20Verify.png" alt=""><figcaption><p>Single Site Architecture Verification Screen</p></figcaption></figure>